NEW FDA PAGE
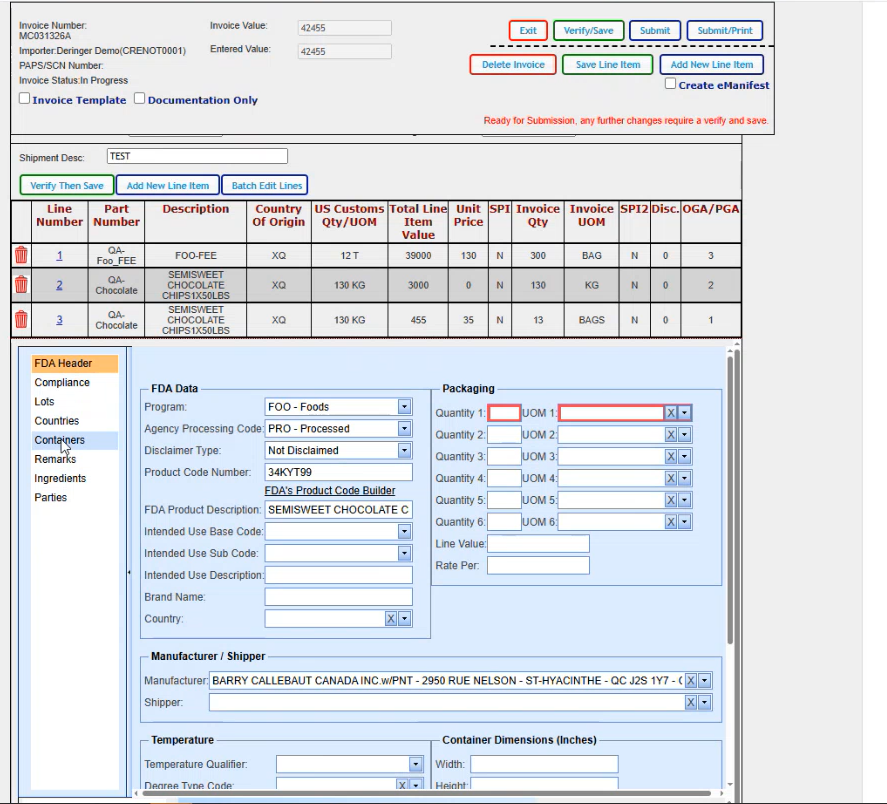
There is now a new FDA page embedded in the INVOICE PAGE. We have already added a couple of lines to our invoice with FDA. For this exercise, we are going to add a new line.
And if we have an FDA template built on the product, it will pull in the FDA information that we have on that template. And for this particular part, we do have a template built.
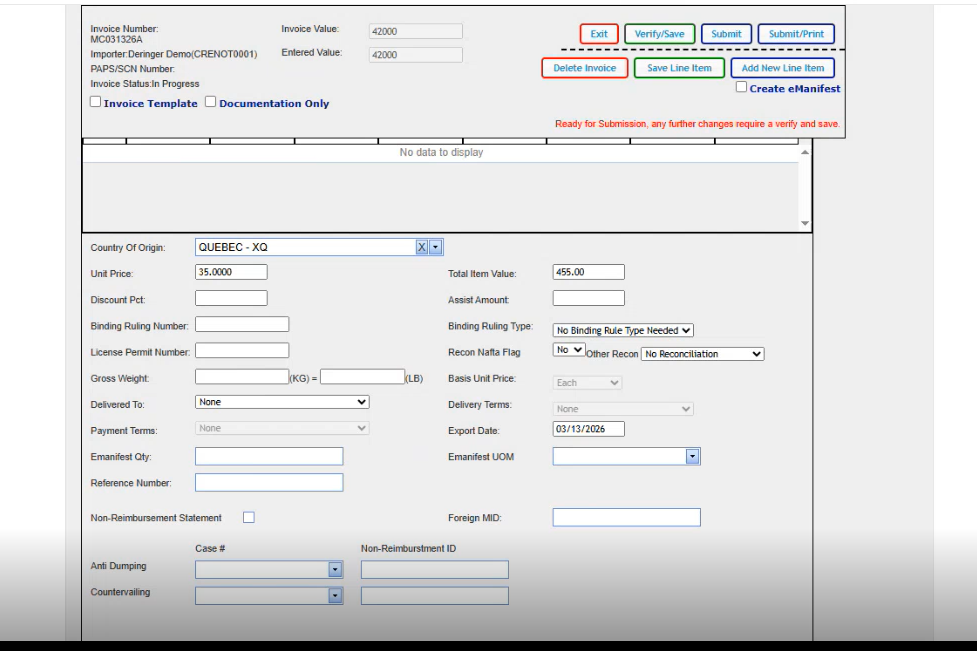
We are going to go down to the unit price tab through for our total and save our line item. Now we can save our line item.

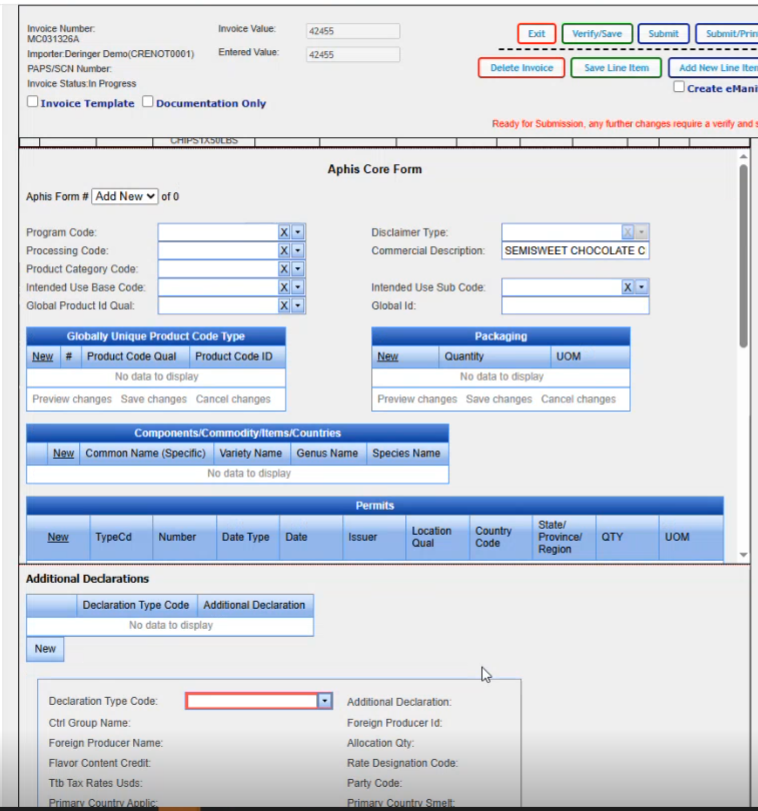
This is the new FDA screen. On the left hand side you see the different areas that you can click on and it will take you into those particular areas. We are going to go back to our header and any of the required fields that aren't filled in. Being in RED is telling you to go ahead and fill them in.
So I have 13 bags. 100 kilograms per bag. Don't pay any attention to the values that we use for the quantities because they don't match up to the total on the line. Anything that's missing that you want to add in, you would could go ahead and add it in at this point in time. We know that the shipper is required, so We are going to add it to the Shipper field.
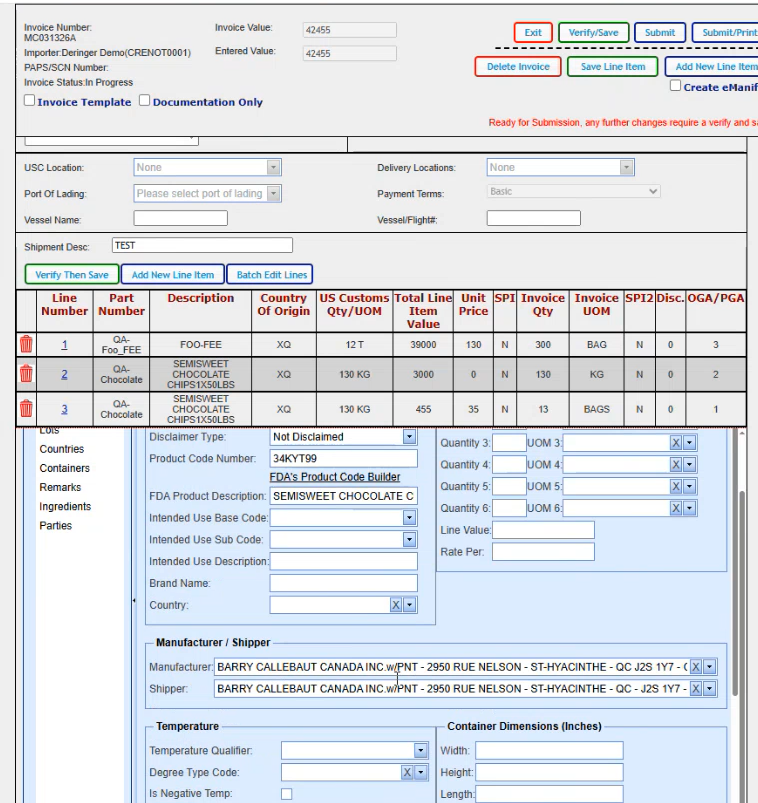
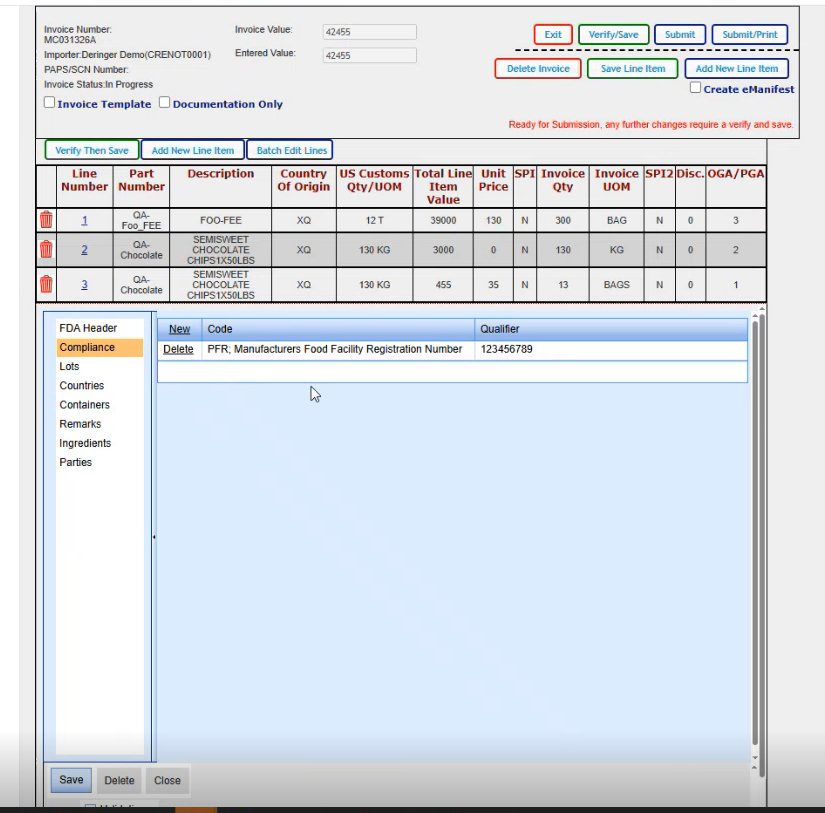
And there's not any other data that I need to add for this particular scenario on the main FDA header screen. So I'm going to go ahead and click on compliance. And our PFR code came up. We don't need anything else here. If we did need to add something else, we could go ahead and click on new and it brings us in a blank line where we could select our next code and enter the qualifier that it belongs with.
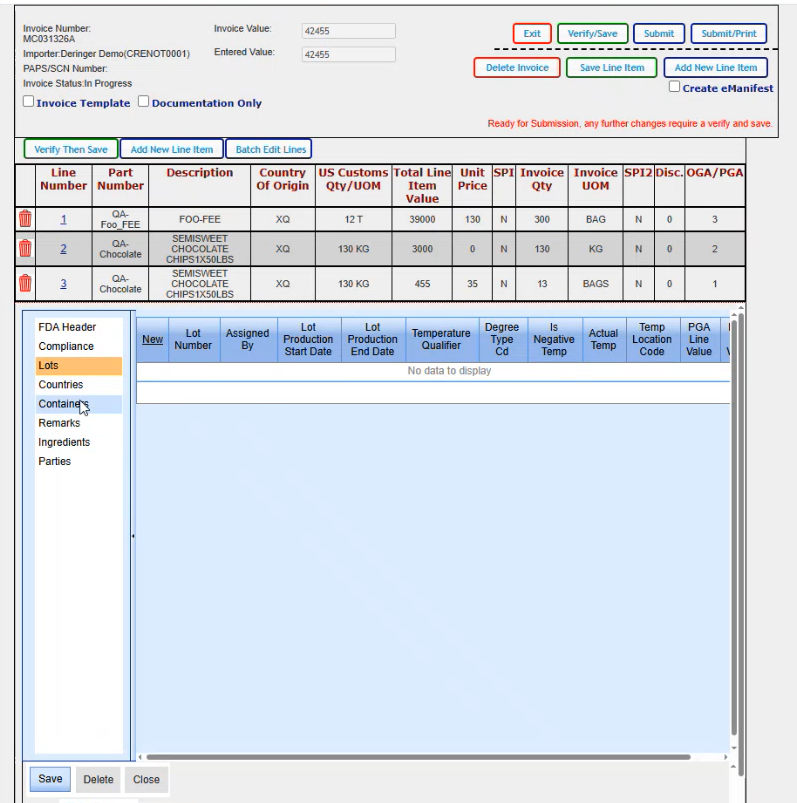
If there were lots that applied that you needed to enter in, this is where you would do that. The new brings up a blank line where you could just enter in your lot number and then just tab or click in each field to enter the data that you need to add.
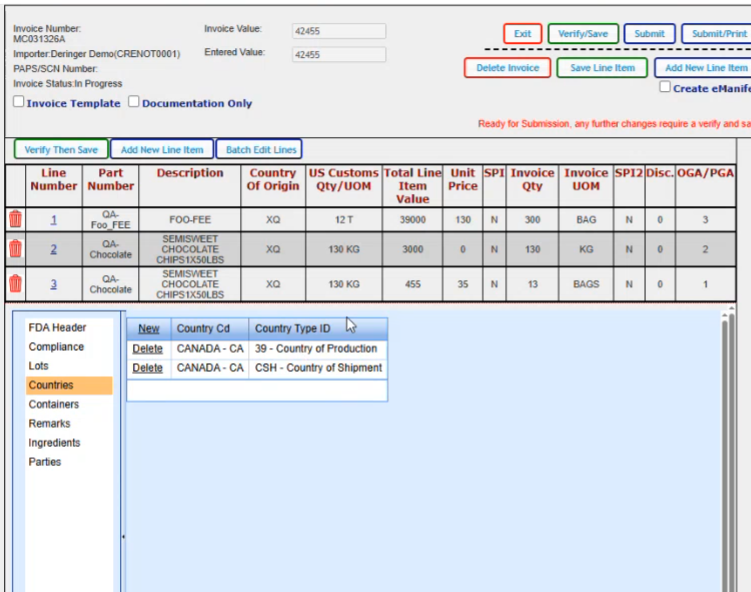
We are going to go to countries for the chocolate because it's food and it's processed, we need a country of production and a Country of shipment and these pulled in from our template; our FDA template that we had built on the product. If we needed to add another country for whatever reason, again we got the new option and then we could select our country, type in whatever we need and pick it from the list and then put in the The type of country that you're needing.
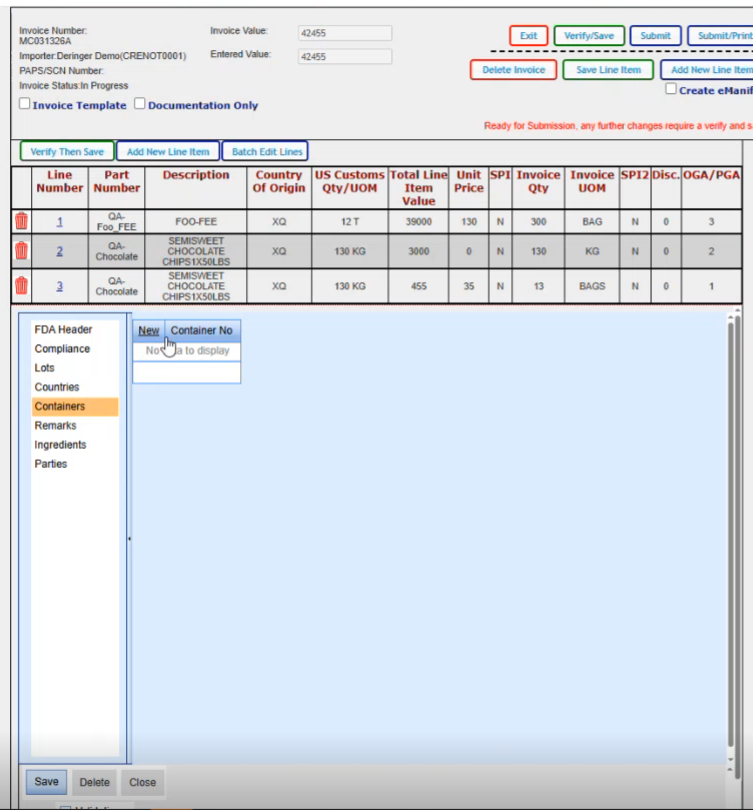
If there were container numbers that applied, you would add your container numbers here. When you click new, it brings you to where you can just put in your container number.
Here, you can have any remarks that you wanted to add. Works the same way with the new and then you have a spot where you you pick your remark type. The only option you have here is general and then you put in whatever remarks that you'd want in this block here.

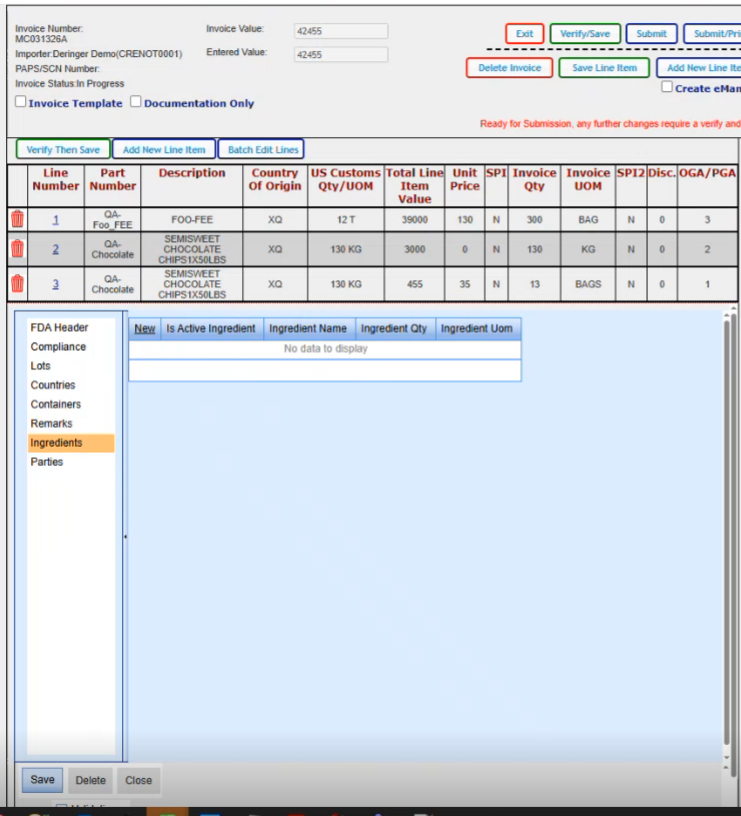
Ingredients. If you needed to report the ingredients that that are within the product…
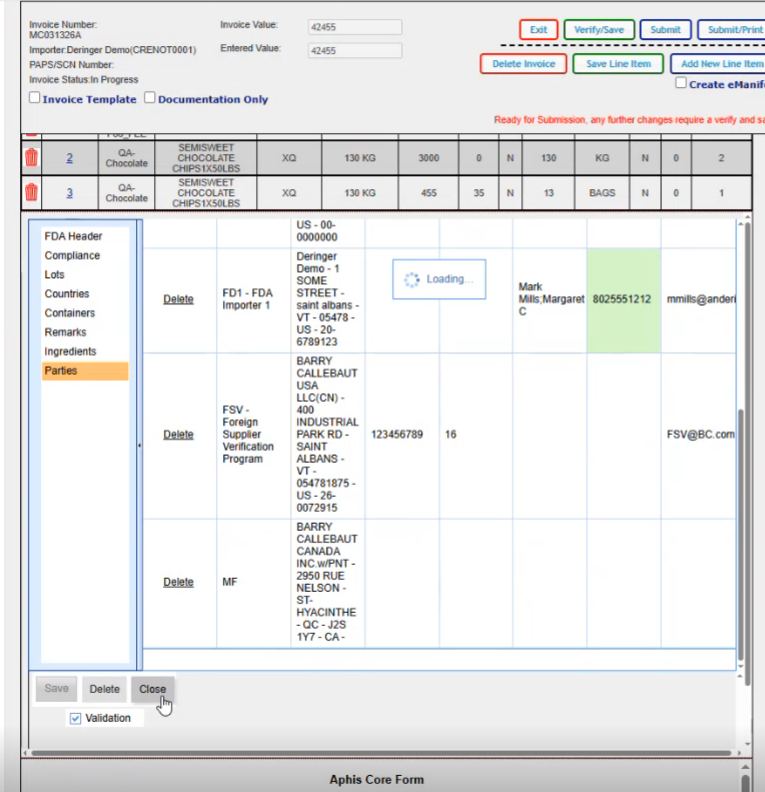
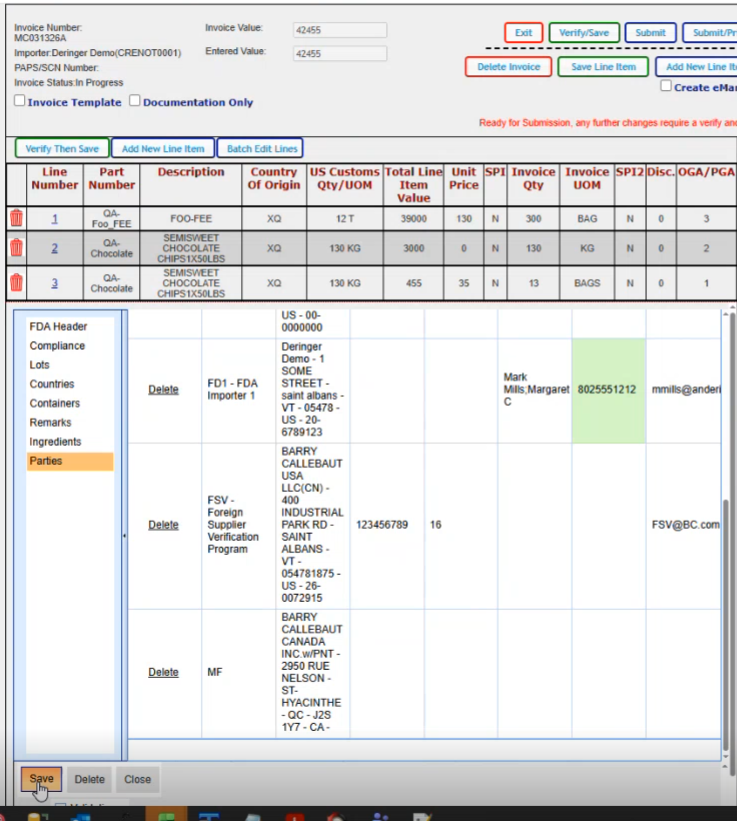
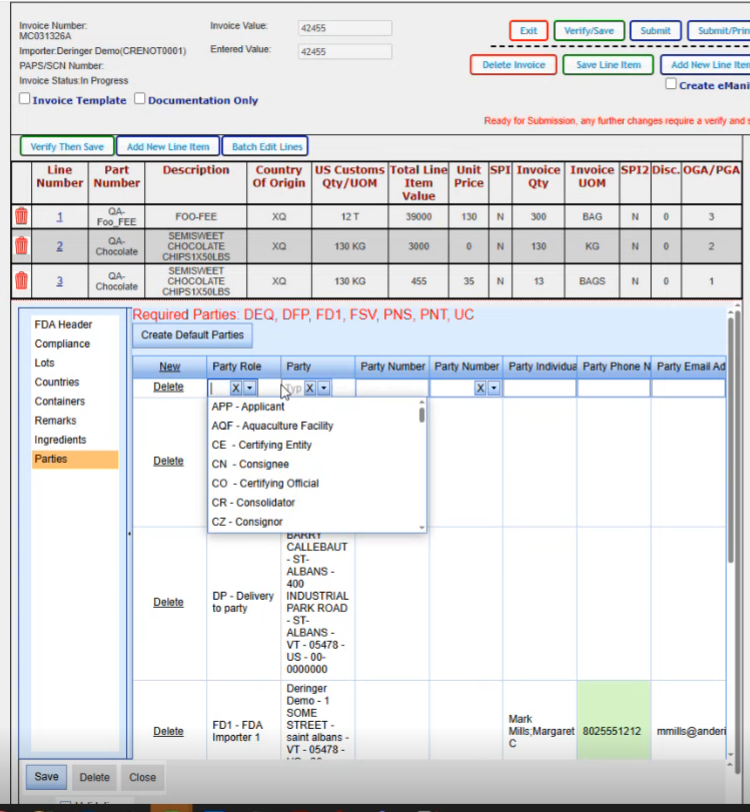
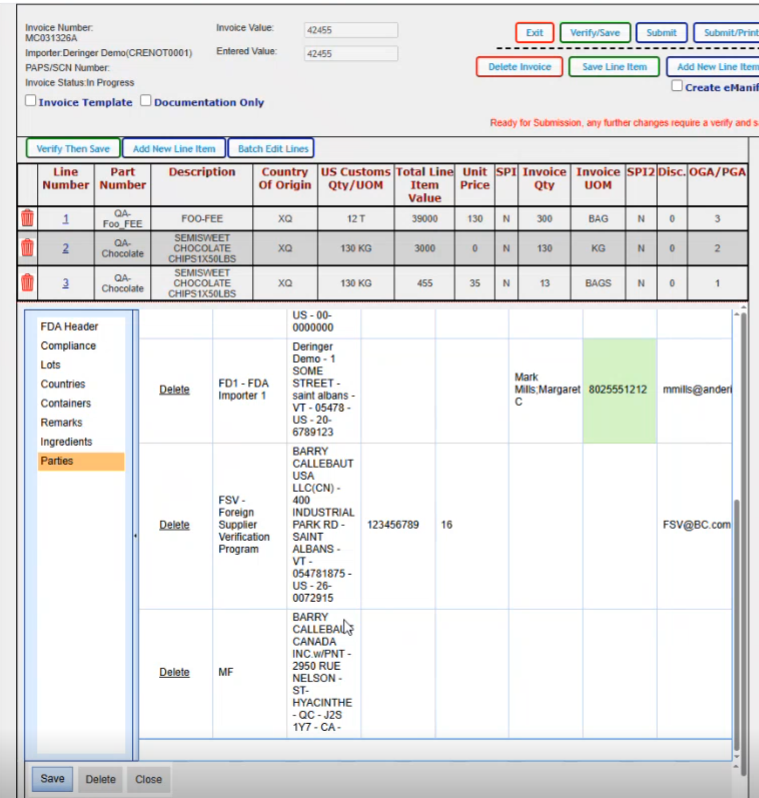
This is where you would add all of your parties that are associated for this particular FDA line.
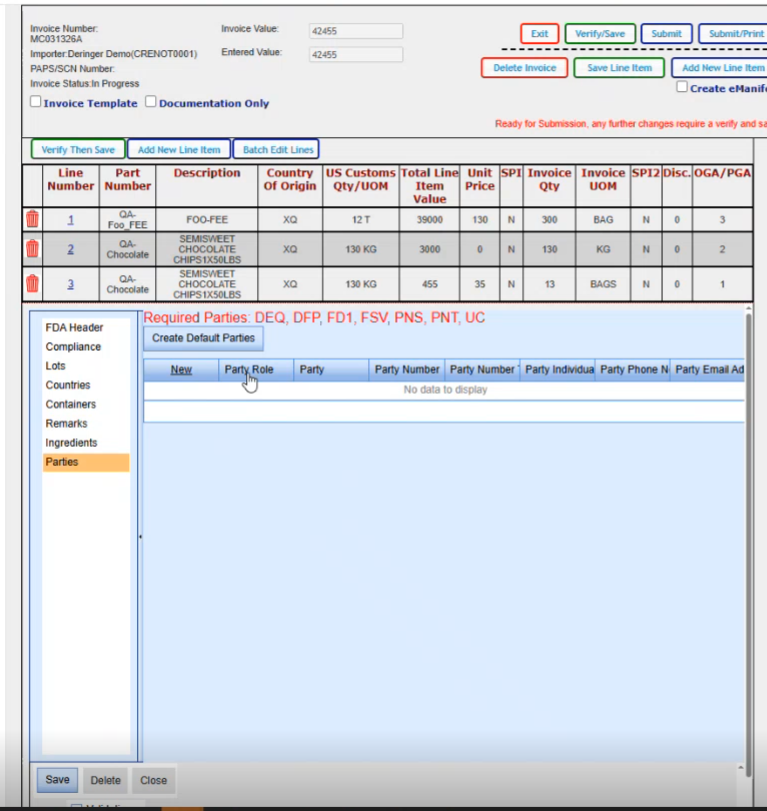
If you click on the create default parties, it will go ahead and create all the parties that it can based on the data that it already has on your shipment; The required parties are the DEQ, the DFP, the FD1, FSV, PNS, PNT and the UC for this particular product. Now if your product varies and let's say you have a natural state product, you might have something other than these parties here.
So we are just going to click on Create default parties. Gives us a message that if there's anything already there, it's going to override it. It will create them.

We created our default parties. We can modify any of them in here if we wanted to. We can delete them if we wanted to. If we wanted to add or change anything, you just click in the block.
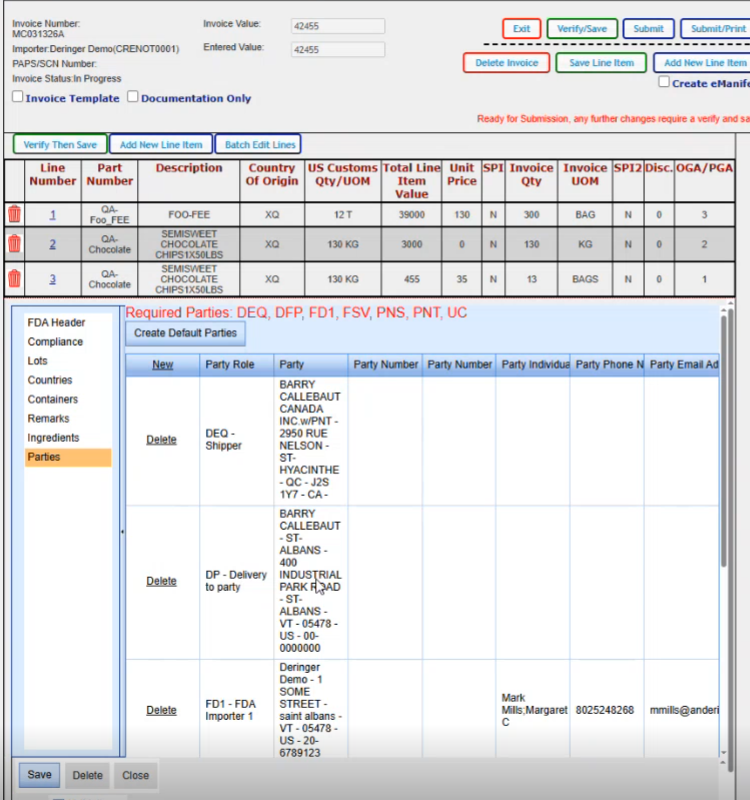
You have the ability to edit. We can just change the phone number on this one for example. And it changes it for this shipment.

Once we've made sure that we have all our parties that we need in here, then we would click on save.
If if you wanted to add an additional party, you do have the option for new here and pick the role and then you would select the party from the dropdown. So these are the different party types that you can have.
One other item to note is for internal Derringer staff ONLY. We do have this validation checkbox. which allows you to turn off validation for FDA data. The intent is just so that we can get through moving this application or this new screen to production and if we needed to turn off validation for any reason just to get the shipment to flow into CM. We would have a quick way to do that.
Down at the bottom you also have a delete FDA and it'll delete the FDA form.
And then you can add a new one if you needed to. It would just delete it all out. If you want to close without saving anything, that's what the close option is. But if you've saved as you've gone along, whatever data that you've added, like if you were to click on save on each one of these sections. it would save that data as you went along. So now click Save and Close…